Sample Debt Management Plan
The following screenshots show a sample case that has been filled in using the CABmoney online Debt management plan. You may find it useful as a guide on how to fill in certain sections.
This guide is for somebody transferring from a previous Debt Management Plan, if you are considering starting a new DMP please see this guide instead.
Step 1: Start your Debt Management Plan
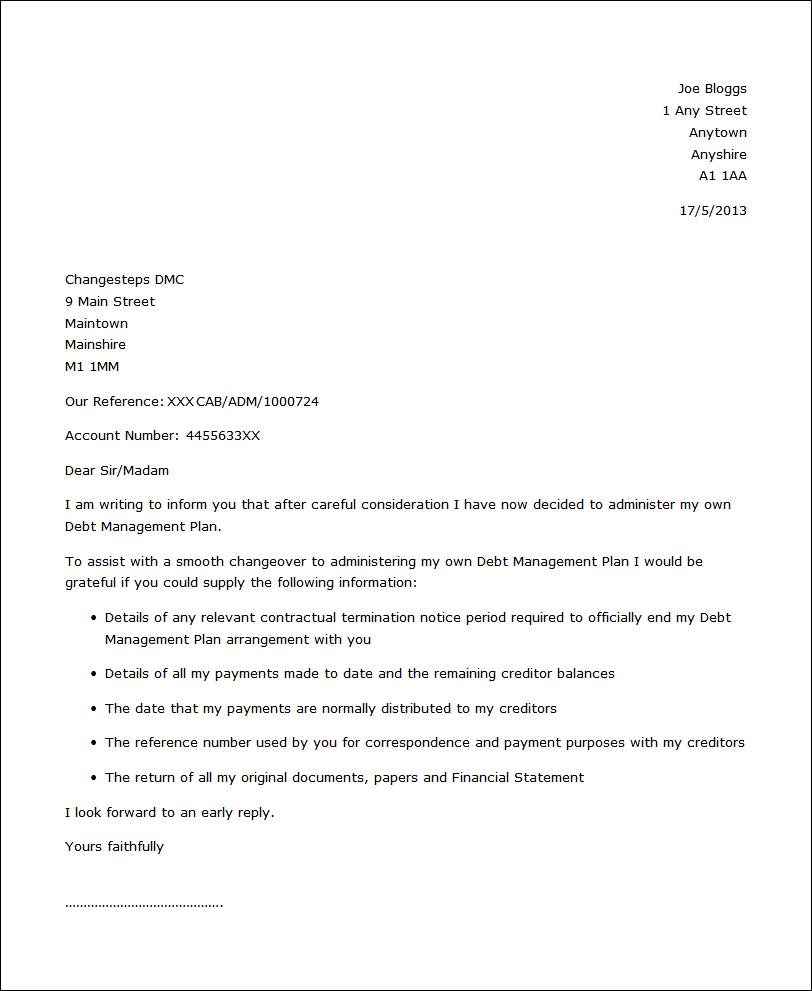
To administer your own Debt Management Plan you will need to have all details and outstanding debt balances along with your income and expenditure figures. You may already have this information to hand, but if you need to retrieve it from your current DMP provider, there is a sample letter available to use.
Step 2: List Priority Debts / Arrears
On your Priority Creditor Checklist, click each heading to expand and enter details.

Step 3: List your Non-Priority Debts
On your Non-Priority Creditor Checklist, click each heading to expand and enter details.

Step 4: Personal Budget Sheet: Household Details
Enter your household details on this form. This is important as some calculations will depend on the number of people in your household.

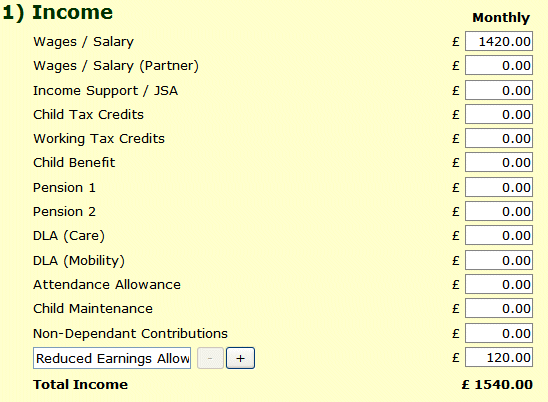
Step 4a: Budget Sheet - Income
Enter your income details here. You can type into the "Benefits/Other" boxes to add income not already listed.
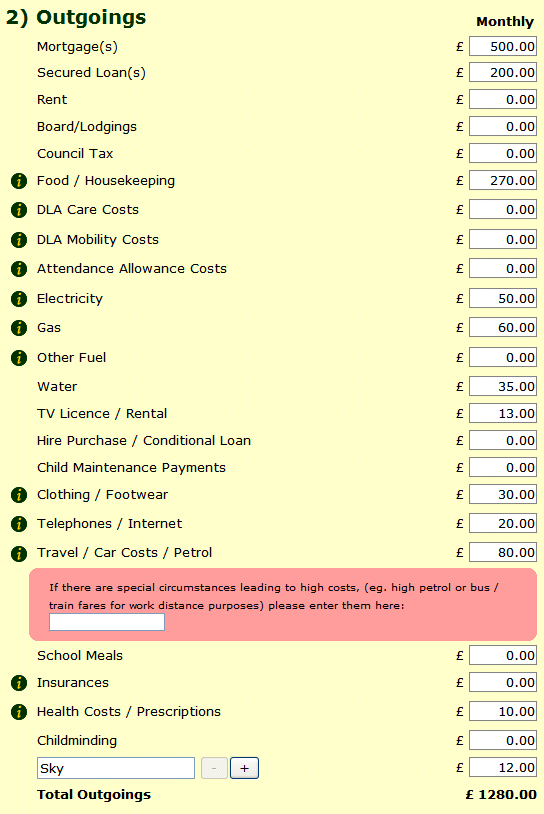
Step 4b: Budget Sheet - Outgoings
Enter your outgoings (or "Expediture") here. Depending on your circumstances (household details etc.) you may be prompted to alter your amount if it seems to high or low. In some cases you may have special circumstances which have made your expenditure high so reasons for this should be noted in the box provided.
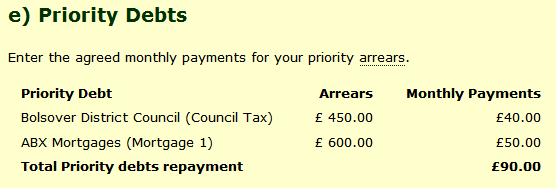
Step 4e: Budget Sheet - Priority Debts
Your Priority Debts will be listed here along with your agreed monthly payments.
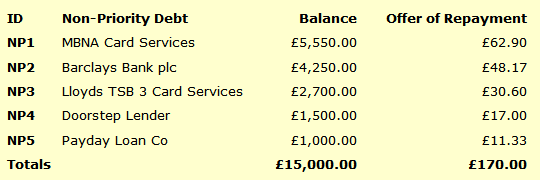
Step 4g: Budget Sheet - Non Priority Debts
Your offers for Non-Priority Debts will be automatically calculated here whether they are Pro-Rata or Token offers.
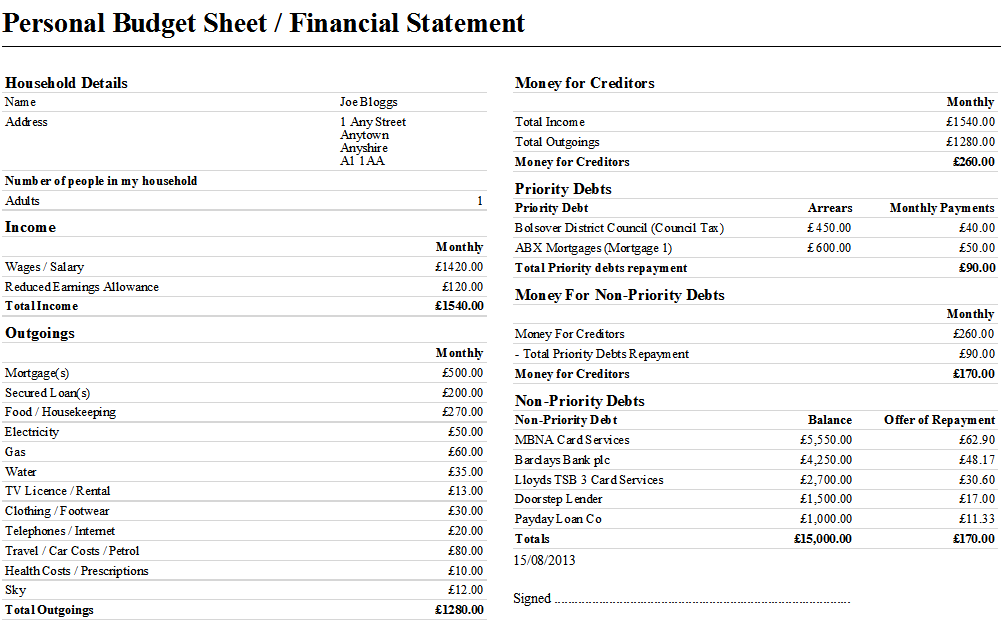
Step 4h: Budget Sheet - Print your Financial Statement
Below is an example of what a printed Financial Statement should look like.
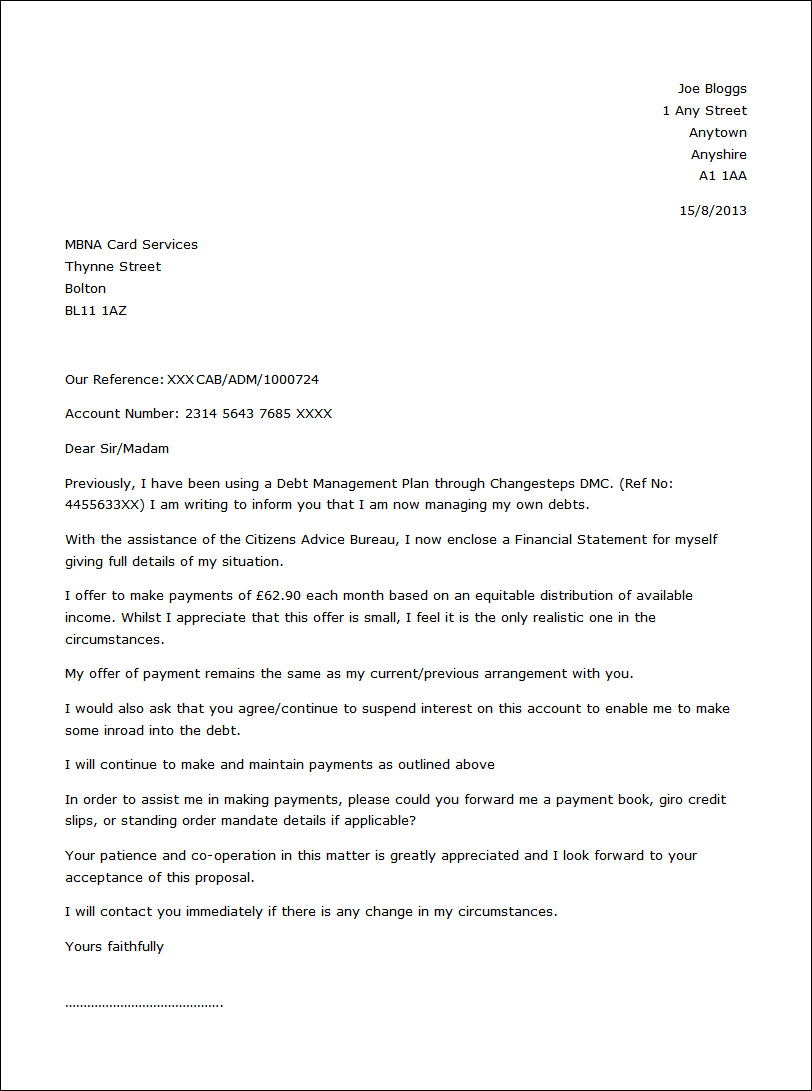
Step 5: Notify Non-Priority Creditors of Your Offer
After entering your name and address and choosing which creditors to write to the offer letter(s) will be automatically generated containing your information.
Step 6: Record Creditor Responses
As you hear back from creditors, record their responses below.

Step 7: Making Payments and Following Up Offers
If creditors reject your offer, send the following letter.

 What does this mean?